Tesla Coil Tuner
Terry Fritz 2/2001
Description:
The Tesla Coil Tuner (TCT) is a simple and low cost signal source that can be used to find the resonant frequencies of the primary and secondary circuits of Tesla coils. It uses simple commonly available parts. It can be assembled in a few hours with minimal electronic skills. The cost of all the parts is about $20.
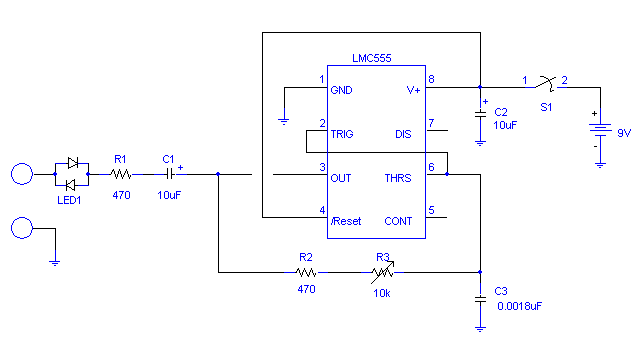
The TCT is simply a LMC555 IC square wave generator. An audio taper pot and a 2% polypropylene timing capacitor control the 50% duty cycle oscillator's frequency.
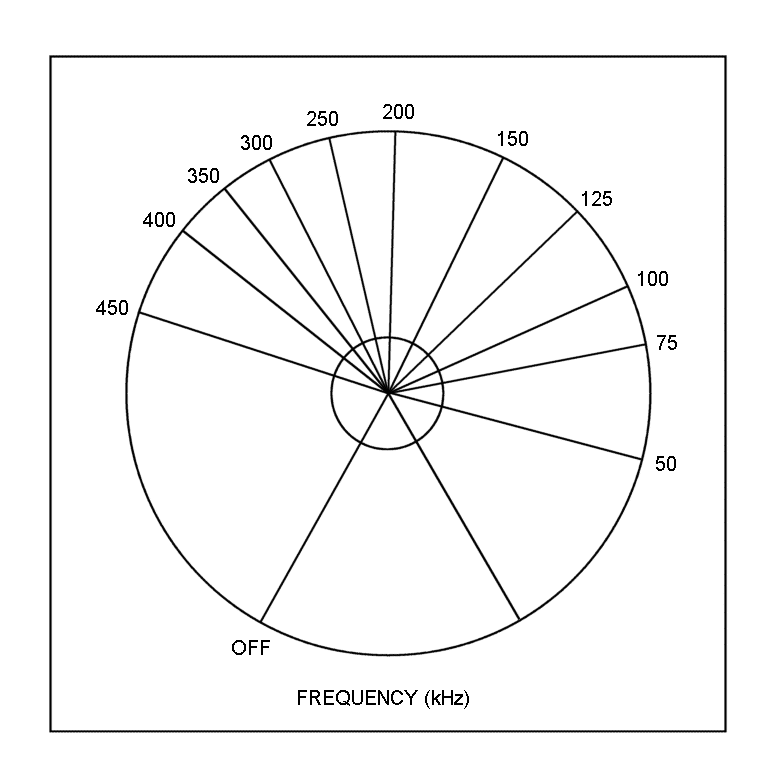
A bi-color LED in series with the output senses the current being drawn and a frequency dial indicates the frequency setting.
Parts List:
QTY Description Part Number Cost
2 Sets red / black alligator clips RS 27-1545 2.99 / 3 sets
1 Large knob RS 274-0433 1.29 / 2
1 Bi-Color LED RS 276-012 1.19
2 10uF 16V tantalum capacitors RS 272-1436 2 x 0.79
1 LMC555 CMOS IC timer chip RS 276-1718 1.39
1 8 pin IC socket RS 276-1995 0.59 / 2
2 470 ohm 1/2 watt resistors RS 271-1115 0.49 / 5
1 1.8nF 50V Polypropylene 2% cap DK P3182-ND 0.39
1 10K Audio taper pot with switch RS 271-215 1.99
1 Plastic box RS 270-1803 3.29
1 Battery Clip RS 270-324 1.89 / 5
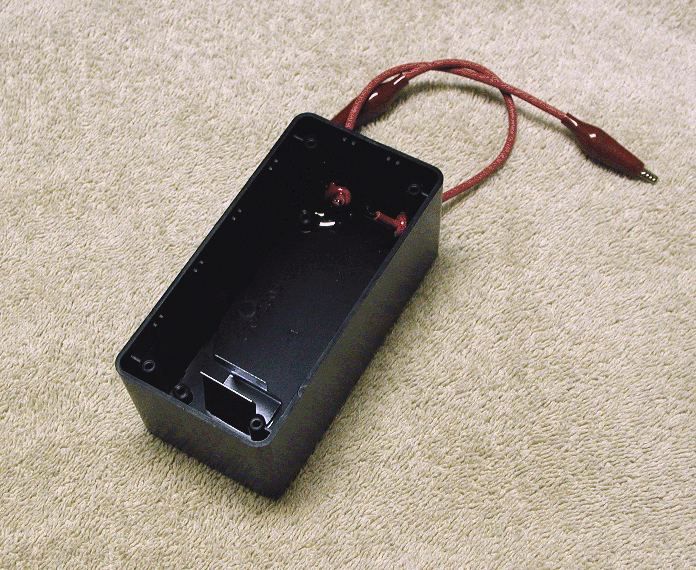
1 Battery Holder RS 270-326 0.99 / 2
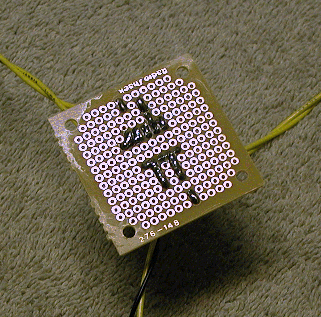
1 Proto Board RS 276-148 1.49 / 2
All parts can be purchased from Radio Shack (part numbers given here) or practically any other electronics parts supplier. The timing cap is from Digi-Key and is rather critical. The rest of the parts are non-critical but the pot should be of good quality. Wiring, layout, and construction are not critical but try to keep the wire lengths reasonably short.
Schematic Diagram:
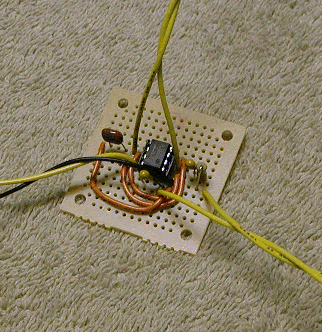
Parts LED1, R2, R3, S1, and the battery are mounted off the board.
Be sure to observe the polarities of C1 and C2.
Assembly:
There are many ways to put the TCT together and it will work fine. For those less familiar with assembling things like this, I will describe how I did it.
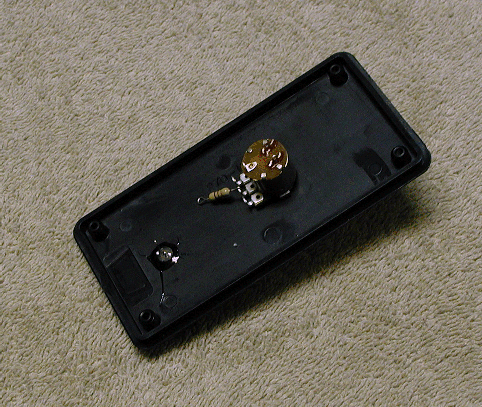
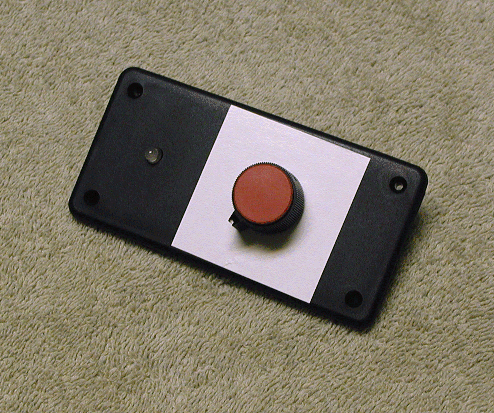
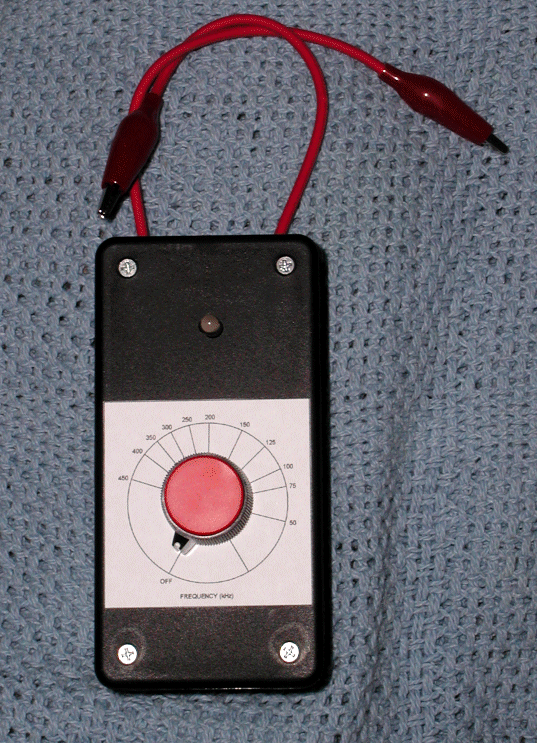
Box assembly: I selected the plastic cover and located two points on the cover. The first was two inches from the bottom and the other one inch from the top. I drilled a 1/4 inch hole at the bottom mark and enlarged it a bit to fit the 10k pot. I then snapped the little tab off the pot with pliers and mounted the pot with the 2.25 x 2.25 inch scale under the nut. I then installed the knob using the off position for alignment. I connected a 470 ohm resistor to the center leg of the pot. I drilled a 3/16 hole at the top mark and was able to force the bi-color led into it. I added a bit of epoxy to hold it in place. I also epoxied the battery holder in the bottom half of the box. I drilled two 9/64 inch holes for two 8 inch lengths of wire to act as test leads in the bottom of the box. I tied and epoxied the leads to the box and installed alligator clips to the ends.
I used two other alligator clips to make a 6 inch jumper to short the spark gap for primary testing.
Circuit: Snap the two circuit boards in half and solder the 8 pin socket in the center of one. Following the schematic, solder the components to the circuit boards noting that S1, R2, R3, LED1, and the battery are mounted off the board. Use hookup wire to make the needed connections and bridge the pads with solder where needed. I put leads on the board for parts off the board.
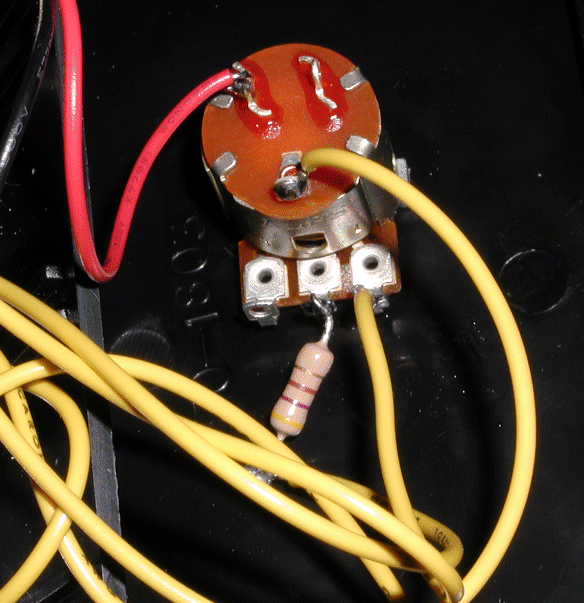
Finish wiring the top and bottom of the box together following the schematic. See the picture for how the pot leads and switch are wired.
Install the battery and assemble the box top with the four screws.
Calibration:
The provided scale will be fairly close. However, if you have a frequency counter or voltmeter with that function, you can calibrate your own scale.
Operation:
The TCT is very easy to use for primary and secondary frequency measurements. Obviously, these test should be done will all power removed from the coil and all capacitors completely discharged! The procedures follow:
Insure all power is removed from the coil and all the capacitors are completely discharged!
Testing the TCT: To tests the TCT's operation, connect the two test leads together. The LED should light and remain lit through the entire frequency range. Replace the battery if the light is dim.
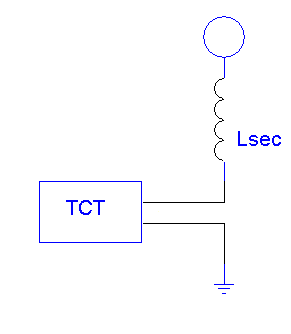
Secondary Fo: To test the secondary's fundamental frequency, simply connect the TCT between the ground and the base wire from the secondary as shown below. Slowly turn the frequency through the range until the brightest spot is found. The lowest and brightest frequency spot is the fundamental. You may see the dimmer 3rd harmonic at ~3 x Fo. It is probably best to test the secondary frequency on the coil in the actual configuration since the secondary frequency is sensitive to the surrounding objects.
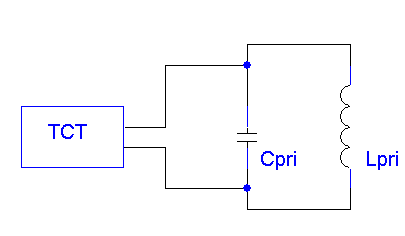
Primary Fo: To test the primary circuit's frequency, simply connect the TCT across the primary cap and short the spark gap with the jumper. Slowly turn the frequency through the range until the dimmest spot is found and read the frequency on the dial. You may want to remove the secondary coil to prevent the secondary from affecting this test.
Notes:
The author / designer of this device specifically releases all aspects of this design to the public domain. It may be copied, sold, plagiarized, constructed, mass-produced, etc. for the good of Tesla coiling. As far as I know, it is safe, works, and not much can go wrong, but I disclaim all responsibility...
Any questions can be directed to: terry@hot-streamer.com
Terry Fritz
February 14, 2001