Pole Pig Ballast
This ballast was intended to be used on the 10kVA pole pig I got from a trade with Dr. Resonance at the 2004 Cheesehead Teslathon.
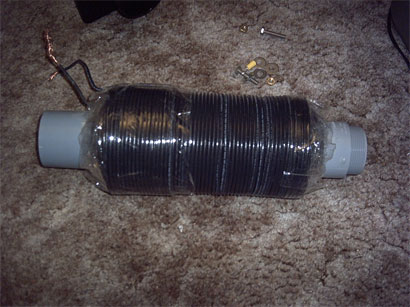
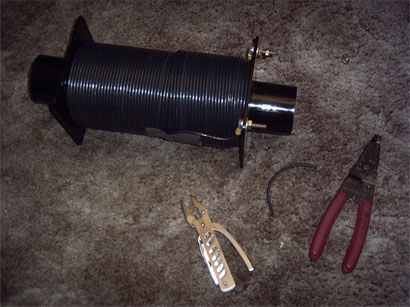
This is version 1.0 - Not too pretty, but functional. Tests below...
Here's one thing I often do when I want to get a good looking, but functional finished product - I build a crappy prototype first, to work the bugs out, then re-work it to make it pretty.
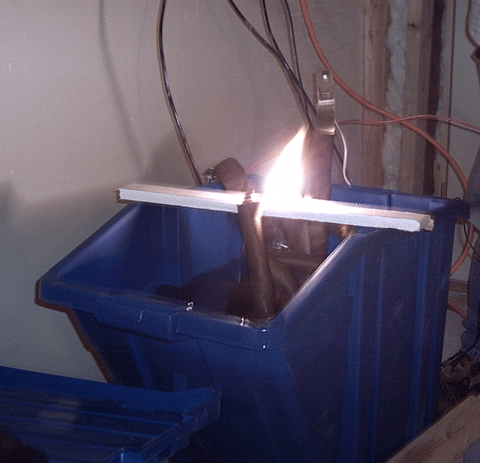
Here's the ballast doing it's thing with the pig (in it's, perhaps temporary, home). It's hard to see where the arc is coming from, but it formed between two screws which the secondary leads are attached to and subsequently anchored to the piece of drywall that bridges the container. With a(n almost) full 5 pound load of 1/8" welding rods, the pig draws 5-7 amps. When empty, it draws 130A. Variable from 2 - 31kVA - not bad.
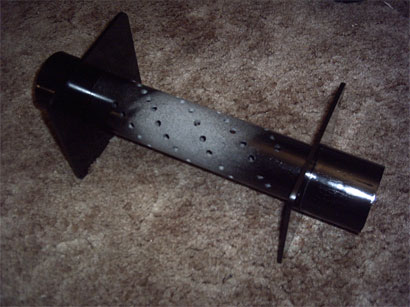
2 inch electrical PVC conduit, 2 couplings, and two lexan squares make up the new former. After drilling some "air holes" in the pipe, the whole deal was glued together and sanded. Electrical PVC doesn't take plastic dye as well as other types of PVC because it is often coated with some sort of glossy agent. However, if you scuff the surface well enough the result will be something like this:
Winding this thing was rough. The spool of wire was real heavy and it took a lot of tension to keep the turns strait. Here I am a little over an hour in winding and my arms are burning. Winding a ballast, in my opinion, is comparable in time and effort to winding a nice secondary coil.

To give you an idea of how much physical effort is put into winding something like this, I've included an artist's depiction of what I looked like before and after the hour and a half of strenuous winding. (Note the slight increase in forearm mass)
Before: After:
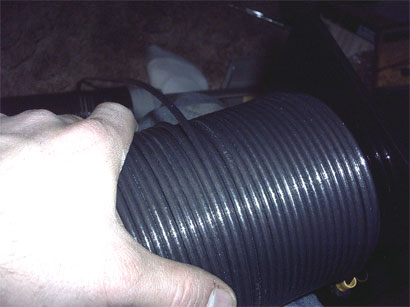
Close up of the turns, they're not perfect, but I think it looks acceptable. Note that nothing is used to secure the turns until the last one. The idea there is to avoid any obstructions to air flow. I may add a fan later, for longer runs in the future.
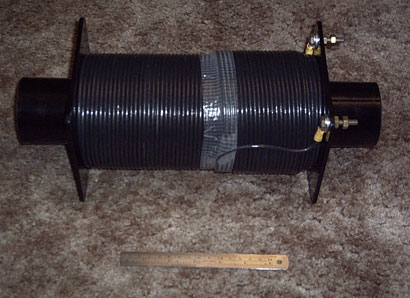
Here she is all wound and terminated.
The finished product. I used "clear" tape with a fiber reinforcement mesh to secure the final turns. The hardware on the end is 1/4-20 with crimps for terminations.
Final Thoughts:
Although I didn't mention it earlier, the wire I used here is stranded THHN. This is important because in an earlier test I discovered that the same gage solid wire got noticably hot while the stranded wire was still cool. This may have been an odd instance, but I wouldn't be surprised to find a lower amount of power dissipated in stranded wire on average (although not neccessarily lower DC resistance).
More core material can fit inside the PVC, I just don't want to buy any more ;-)
The holes in the PVC are probably useless. It was really a half-hearted attempt to afford better cooling to the inner turns. To really improve airflow, I would probably put some sort of spacers at 90 degree intervals to create voids in the windings, staggered across the layers. Then with some holes in the end plates, air could actually be forced between layers. I don't intend on running anything for the amount of time it would take to build up that much heat, so I didn't invest much time or energy in this area.
Instead of sliding the entire core in and out of the coil, I will most likely just vary the number of rods in Tesla Coil duty. If the entire stack is ever moved, the only purpose would be for a "soft start". With the excess space inside the coil, I could make a sliding compartment that securely fits the length of my core material.
Better care could have been taken to keep the turns strait and the number could have been worked out to fit evenly such that my start and end turns would be on top of one another (i.e. on the same end, near the terminations). However, I just estimated the dimensions so the coil would be just shorter than the core.
The overall design of this project was a combination of ideas from the Tesla Coil Mailing List, and from looking at the slide chokes in a neon sign factory I once worked at.
Materials:
500 ft 10AWG Stranded THHN - $45 from Home Depot as of November 2004
6" square lexan sheets - free from in stock (wood could have done the job, so no dough lost here)
Hardware ~$2 from ACE - crimps ($0.50), bolts ($0.50), nuts ($0.70), washers ($0.25)
2" Electrical PVC - Free from trash
2" Electrical PVC Couplings - $1.29 + tax at ACE
Plastic Dye (optional) - $5 from Menards
Welding Rods - $5 from Menards
TOTAL = $60
Time:
Fabrication: 2.0 Hours
Winding: 1.5 Hours
Drying (dye) : 12 Hours
Finishing: 0.2 Hours
Time Worked: 3.7 Hours
Time Elapsed: Two Days
Note that the time and materials are not included for the prototype because the materials were re-used and the time spent could have been avoided by some equations and a little know-how.