Secondary & Winding Jig
Latest Notes on Secondary Construction (Model 1B):
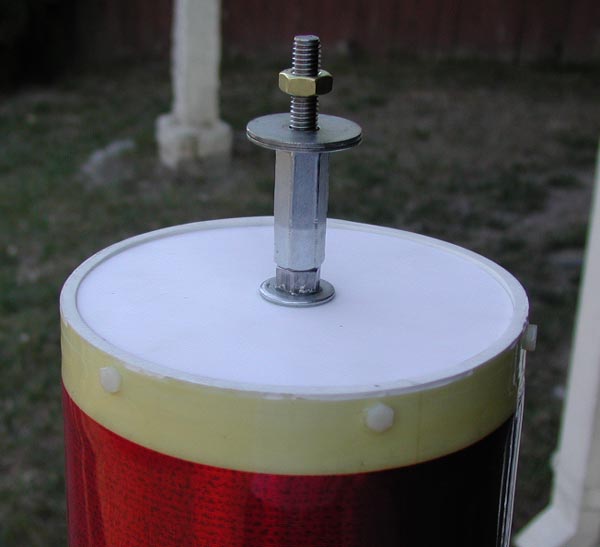
This is an improved method of secondary construction. The wire enters the coil form and attaches to the 3/8" bolt. I use a coupler and various lengths of 3/8" threaded rod to place the toroid at whatever height I want. Note that there isn't much space between the last turn and the top of the coilform. This design feature is very important when you use toploads that need to be near the windings, i.e. psuedo-toroids and spheres. Note that you must place baffles inside the secondary if you route the wire into the form. I used 2 plexi baffles located about 6" from each end of the form. The baffles are held in place with GE silicone sealant.
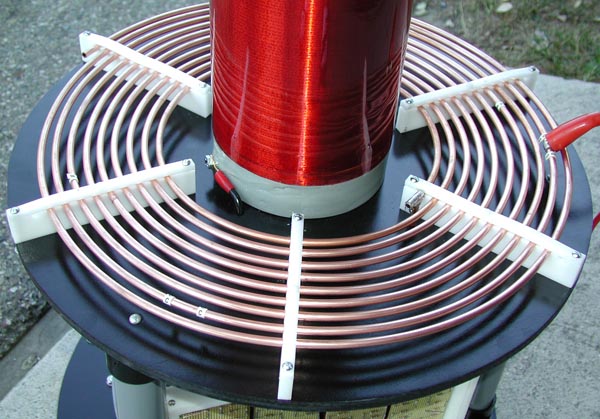
You can see the new ground connection is much closer to the windings. This makes it easier to adjust the coupling of the system by shimming the secondary up. The secondary simply slip fits down on top of a 3" wooden plug that is mounted to the circle that holds the primary. You will also notice a nice new shine on the coil. I sanded the old beat-up varnish smooth and applied a new coating of something called Glaze Coat. Glaze Coat is a 2 part epoxy mix that makes a coat equivalent to 60 layers of varnish in one application! It looks great.
1st attempt at making a secondary
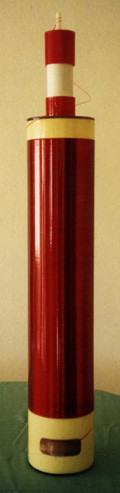 The secondary is wound on a 32" inch long section of the
6" PVC drain pipe.
The secondary is wound on a 32" inch long section of the
6" PVC drain pipe.
It is important to note that PVC has terrible dielectric properties at
radio
frequencies should be treated prior to use. An excellent method
for building
the secondary is laid in the Tc-plans.zip file
that is shown above. In a nutshell,
the PVC is sanded, baked, coated several times with polyeurathane
varnish,
wound, coated some more, and hermetically sealed.
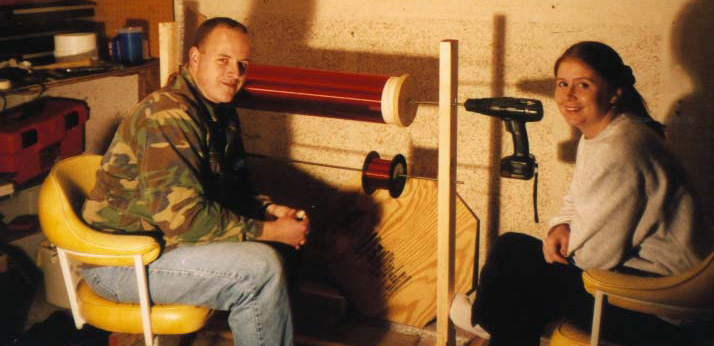
I choose to build a jig to aid in the coil coating and
winding process. Since I don't
forsee winding too many coils, my goal was simplicity and low
cost. The entire jig
is made from (3) 2"x3"x8' boards, (2) 4 ft long piece of 5/16
steel rod, some 5/16"
washers, and some really tiny cotter pins. The PCV has 3/4"
plywood circles fitted
tightly into each end. The circles have a 5/16" hole drilled
in the center for the steel
rod. The 2x3s are use to build a frame to support the steel rod
and the PVC. A
cordless drill is used to rotate the steel rod and PVC.
Laura (Thanks Laura!) was
kind enough to operate the drill while I handled the wire.
This thing isn't the most
sturdy arrangement, but... total material cost was about $18, nails and
all.